
What Actually Goes On Top: The Layers of a Resin Overlay Over Existing Tiles
A seamless resin finish over existing tiles is six stages, not one coat. The build-up in order, why the reinforcing mesh is mandatory, and what each layer does.
- 4.8★ Google · 17 reviews
- £500 per week if we finish late
- £17m insurance cover · £5m public liability
- 12-month warranty on second-fix fittings · HomePro registered
- £550 survey credited in full
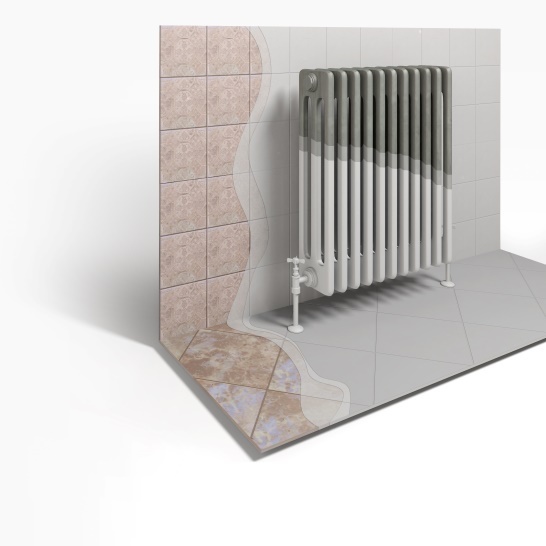
A seamless resin finish over existing tiles is 6 applied stages and around 2–3 mm of total thickness — not 1 coat, and not a product you roll on. The tile stays in the room, which is the whole point, but it only stays there successfully because of what the first three stages do to it. Our seamless bathroom page covers the offer, and the refit carbon post covers why leaving the tile in place matters beyond the dust.
The figures and the build-up below are the manufacturer's, taken from the installation manual for the system we fit. They are fair to repeat and attribute. They are not our own laboratory testing and we do not present them as such.
Why the layers exist at all
The question behind every one of these coats is the same: the tile underneath is not flat, not continuous, and not staying still. It has grout lines. It moves slightly with the building. A finish two or three millimetres thick, bonded directly to that, will eventually show you every joint it is sitting on.
So the build-up does three jobs in order — bond to the tile, bury its joints and reinforce its movement, then finish and protect. Each coat belongs to one of those three.
The build-up over existing tiles, in order
- 011 · Tap-test, key and degrease the tile. The whole area is tapped first to find voids, then abraded and degreased for both a mechanical and a chemical key. A glaze is designed to shed liquid, which is exactly the wrong property under a bonded finish.
- 022 · Fill the grout lines flush. The joints are filled level and any cracks or static joints are reinforced. This is the step that removes the tile grid, and it is the one most often left out of a cheap quotation.
- 033 · First levelling coat, with the mesh. A 2 x 2 mm alkali-resistant glass-fibre mesh bedded in, overlapped by at least 2 cm. Mandatory over tile. In wet areas the waterproofing tape and corner pieces go in at the same time.
- 044 · Second levelling coat, at least 12 hours later. It buries the mesh and brings the build-up to roughly 2 mm, then gets sanded and vacuumed. The wait is in the manual, and rushing it is how mesh pattern ends up visible in raking light.
- 055 · Two colour coats. The finish itself, trowelled, matched to your colour. The texture is made here — smooth, trowelled or torn — and a second colour can be worked over the first to pull the shading out.
- 066 · Sealer and topcoat, two coats — three in a wet area. A two-component water-based polyurethane in matt, satin or gloss. Pipes, drains and lights are sealed so the waterproofing stays continuous; the wet-area third coat is not optional.
The one line to take from thisTwo stages do the work you will judge the job on: the grout lines filled flush, which removes the grid, and the mesh in the first levelling coat, which stops later movement opening a line through the finish. Both are in the manual for tile. If either is missing from a quotation, that is the question to ask.
The same system over other substrates
Not every room is tiled, and the build-up changes underneath while the finish stays the same.
That last case is the one people underestimate. Because the system will run over board and furniture as well as walls and floors, a worktop, an upstand and a wall can be one continuous surface with no joint to seal and nothing to fail. We have delivered that on a kitchen island with an undermount sink, and it is the strongest argument for the system that exists.
What the manufacturer certifies
These are Litokol's figures for the system, quoted from the manual, and they are worth knowing because they are unusually specific for a decorative finish.
- 01Around 2–3 mm total thickness. Which is why thresholds and door bottoms usually survive the job.
- 02Class A+ and EC1 PLUS for emissions. French indoor air classification and the GEV emissions class — relevant in a bathroom or a bedroom more than most people realise.
- 03Tested against bacteria and viral load. 99.9% of bacteria after 24 hours to ISO 22196, and 99.7% of viral load after 6 hours to ISO 21702 — the manufacturer's testing, on the system, not ours.
- 04Repairable in place. Spot damage is made good with a companion product in the same colour, rather than by taking up an area. A seamless floor that cannot be repaired is a liability, so this one matters.
Two honest notes alongside those. There is no published Environmental Product Declaration for this system, so we cannot give you a net whole-life carbon comparison against new tile and will not pretend to — that caveat is set out properly in the carbon post. And the colour names we present are our own curated selection, not the manufacturer's product names; the full palette runs to twenty-seven nuances, with any RAL or NCS colour available to order.
What this is not
It is not faster than it sounds. The coats go on over days rather than hours, the twelve-hour wait between primer coats is real, and the topcoat needs its own time before the room takes traffic. What an overlay removes is the demolition, the skip and the dust — not the programme.
It is also not a way of avoiding a survey. A finish this thin is governed by what is underneath it, so the survey is doing more work here than on a conventional tiled refit, not less. The pre-contract measured survey is credited in full against the contract if you appoint us, which is the only sensible way to price something this dependent on the condition of the substrate.
Getting to a number
A resin overlay is priced from measured surface area — walls, floor, reveals and any worktop the finish runs onto — rather than from the floor area of the room. If you want the conventional comparison first, the bathroom cost guide prices a tiled refit off the same rate card. The two are very different numbers in a small bathroom, which is why the calculator asks you to measure the room rather than guess it.
Straight answers
The home you actually want, finished on the date in the contract — and you watch every day of it happen from your phone.
You answer 3 questions. We do the drawings, planning, party wall, trades and snagging.
- 10% to mobilise, then weekly against work already done — with 5% held past handover: 2.5% released at practical completion and 2.5% at the end of the 12-month defects period
- £550 survey fee credited in full against your contract
- Every variation priced and signed before a penny is spent
No email needed to see your range. Quotes hold for 21 days, then materials re-price.
We are not the cheapest. If price is the only factor, we may not be the right fit — and that is fine.
Keep reading
- A Wrap-Around Extension Priced Three Ways: What Design and Build Actually CostsA real London wrap-around extension quoted three ways: the three phases, nine milestones, two decision gates, and where every pound of the total went.
- What a Seamless Bathroom Job Actually Covers, Surface by SurfaceA seamless bathroom is quoted by measured surface, not floor area. Every surface the overlay covers, the seven stages on site, and the three it cannot do.
- How to Choose a Design and Build CompanySix questions that separate a design and build company from a company that subcontracts both halves and hopes. What to ask, and what a straight answer sounds like.
- Commercial Design and Build Companies, LondonWhat commercial design and build actually buys you on a London workplace project, what it does not, and the questions that separate a contractor from an introducer.